Support our educational content for free when you purchase through links on our site. Learn more
🎚️ 7 Essential Types of Professional Audio Equipment (2026)

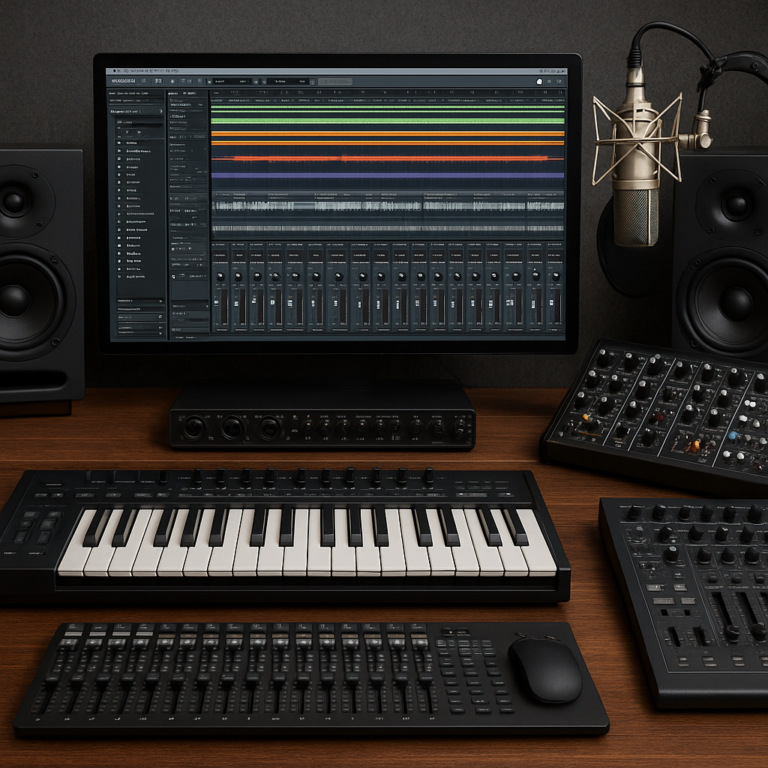
The single most important factor in your audio chain isn’t the most expensive microphone or the flashiest mixer; it’s understanding the specific types of professional audio equipment that match your unique acoustic environment and workflow. Whether you are building a bedroom studio or outfiting a live venue, choosing the right gear from the start prevents costly mistakes and ensures your sound translates perfectly to any system.
We once watched a talented producer spend a fortune on a pristine Neumann U87 only to record it in a room with zero acoustic treatment, resulting in a muddy, boxy mess that no amount of EQ could fix. The gear was world-class, but the signal chain was broken before the sound even hit the preamp.
Did you know that the first commercial digital recording in 1978 used a Sony PCM-160 that weighed over 10 pounds and required a dedicated truck to transport? Today, that same quality fits in a laptop, yet the fundamental types of professional audio equipment remain critical to capturing that magic.
Key Takeaways
- Match Gear to Environment: The best types of professional audio equipment are useless if your room acoustics aren’t treated; always prioritize bass traps and absorption before upgrading your microphone.
- Understand the Signal Chain: From the microphone to the interface, every link matters; a high-end preamp cannot fix a poorly placed mic, and a great mix sounds terrible on bad monitoring systems.
- Hybrid is the Future: Modern professionals often blend analog warmth (like tube preamps) with digital precision (DAWs and plugins) for the ultimate workflow.
- 👉 Shop by Category:
Microphones: Amazon | Sweetwater
Studio Monitors: B&H Photo | Guitar Center
Audio Interfaces: Amazon | Thomann
Table of Contents
- ⚡️ Quick Tips and Facts
- 📜 From Tape to Digital: A Brief History of Professional Audio Gear
- 🎙️ Microphones: The Front Line of Sound Capture
- 1. Dynamic Microphones for High SPL and Durability
- 2. Condenser Microphones for Studio Detail and Sensitivity
- 3. Ribbon Microphones for Vintage Warmth and Smooth Highs
- 4. Boundary and PZM Microphones for Room Ambience
- 🎛️ Mixing Consoles: The Heart of the Signal Flow
- 1. Analog Mixing Desks for Tactile Control and Harmonic Saturation
- 2. Digital Audio Workstations (DAW) Controllers and Hybrid Consoles
- 3. Live Sound Digital Mixers for On-the-Fly Processing
- 🔊 Monitoring Systems: Hearing the Truth
- 1. Studio Reference Monitors for Flat Frequency Response
- 2. Near-Field vs. Mid-Field vs. Far-Field Speaker Configurations
- 3. Headphones for Critical Mixing and Tracking
- 🎚️ Outboard Gear and Signal Processing
- 1. Compressors and Limiters for Dynamic Control
- 2. Equalizers (EQ) for Tonal Shaping and Correction
- 3. Reverbs, Delays, and Modulation Effects Units
- 4. Preamps and Channel Strips for Color and Gain Staging
- 🎹 Musical Instrument Digital Interface (MIDI) and Controllers
- 🎧 Professional Headphones: Closed-Back vs. Open-Back for Tracking and Mixing
- 🔌 Cables, Connectors, and Signal Integrity
- 🏗️ Acoustic Treatment and Room Calibration Essentials
- 🛒 How to Choose the Right Professional Audio Equipment for Your Studio or Live Setup
- 💡 Common Mistakes to Avoid When Buying Pro Audio Gear
- 🏆 Top Brand Recommendations and Why We Trust Them
- ❓ Frequently Asked Questions About Professional Audio Equipment
- 🔗 Recommended Links and Resources
- 📚 Reference Links and Technical Documentation
- 🏁 Conclusion: Building Your Ultimate Audio Chain
⚡️ Quick Tips and Facts
Before we dive into the labyrinth of knobs, faders, and cables, let’s get the myths out of the way. You don’t need a million-dollar studio to make a million-dollar sound, but you do need to know what you’re buying.
- The “Cable Myth”: Yes, a $5 cable and a $50 cable can sound different, but usually only if the cheap one is broken or unbalanced. For pro gear, balanced connections (XLR, TRS) are non-negotiable for runs over 6 feet to kill hum and hiss.
- The “More is Better” Fallacy: Buying a $2,0 microphone for a podcast recorded in a bathroom with no treatment is a waste of money. Room acoustics often matter more than the gear itself.
- Gain Staging is King: No amount of expensive EQ can fix a signal that was recorded too hot (clipping) or too quiet (noise floor). Learn to gain stage before you buy your next compressor.
- The “First Video” Warning: Ever seen a video where someone plugs a massive, rack-mounted pro amplifier into their living room speakers? We’ve seen it. The Crown XTi 602 is a beast, pumping out over 20 watts, but as one reviewer pointed out, its internal fan sounds like a jet engine taking off. It’s perfect for a stadium, but for your quiet listening room? Not so much. It’s a classic case of “right tool, wrong job.”
If you’re wondering what exactly falls under the umbrella of “pro audio,” check out our deep dive on What are examples of audio products? to get a visual head start.
📜 From Tape to Digital: A Brief History of Professional Audio Gear

To understand where we are, we have to look at where we started. The journey from magnetic tape to digital audio workstations (DAWs) isn’t just a story of convenience; it’s a story of how we capture the soul of sound.
In the golden age of analog, engineers like George Martin and Phil Spector were sculpting sound with physical tape. They used tape saturation to add warmth, a characteristic that digital plugins still try to emulate today. The equipment was massive: 2-inch 24-track tape machines, massive mixing consoles from Neve and SSL, and outboard gear that filled entire rooms.
Then came the digital revolution. The Sony PCM-160 brought digital recording to the masses in the 80s, followed by the Pro Tools era in the 90s. Suddenly, you could edit audio with a mouse. The “tape hiss” was gone, replaced by the “digital silence” that some argue lacks character.
Today, we live in a hybrid world. We use analog emulations in our DAWs while running signals through vintage tube preamps. The history of pro audio is a constant tug-of-war between the warmth of analog and the precision of digital.
Did you know? The first commercial digital recording was made in 1978 by Telarc using a Sony PCM-160. It was a recording of Stravinsky’s Rite of Spring.
🎙️ Microphones: The Front Line of Sound Capture
If the microphone is the ear of your studio, then the preamp is the brain. But without a good ear, the brain has nothing to process. Choosing the right mic is the single most critical decision in the signal chain.
1. Dynamic Microphones for High SPL and Durability
Dynamic mics are the workhorses. They use a moving coil attached to a diaphragm. They are rugged, handle high sound pressure levels (SPL), and don’t need phantom power.
- Best For: Snare drums, guitar amps, live vocals, and screaming singers.
- The Legend: The Shure SM57 and SM58. You can drop these, run them over with a truck, and they’ll still sound great. They are the standard for a reason.
- The Heavy Hitter: The Sennheiser MD 421. A favorite for toms and bass cabinets, offering a switchable bass roll-off that saves you from muddy low-end.
Pros:
✅ Indestructible build quality.
✅ Handles high SPL without distortion.
✅ No phantom power required.
Cons:
❌ Less sensitive to high frequencies compared to condensers.
❌ Can sound “boxy” if not positioned correctly.
👉 Shop Shure on: Amazon | Sweetwater | Shure Official
2. Condenser Microphones for Studio Detail and Sensitivity
Condensers use a capacitor (hence the name) and require phantom power (usually 48V). They have a lighter diaphragm, making them incredibly sensitive and capable of capturing the finest details and high-frequency air.
- Best For: Vocals, acoustic guitars, pianos, and overheads.
- The Industry Standard: The Neumann U87. It’s the mic you hear on countless hit records. It’s expensive, but it’s the benchmark.
- The Budget King: The Audio-Technica AT2020. It proves you don’t need to spend $3,0 to get a great studio sound.
Pros:
✅ Exceptional transient response and detail.
✅ Wide frequency response.
✅ Versatile polar patterns (cardioid, omnidirectional, figure-8).
Cons:
❌ Fragile; sensitive to humidity and physical shock.
❌ Requires phantom power.
❌ Can pick up too much room noise if the room isn’t treated.
👉 Shop Neumann on: Amazon | B&H Photo | Neumann Official
3. Ribbon Microphones for Vintage Warmth and Smooth Highs
Ribbon mics use a thin strip of metal (aluminum) suspended in a magnetic field. They are famous for their natural high-frequency roll-off, which sounds incredibly smooth and “vintage.”
- Best For: Brass instruments, guitar cabinets, and harsh vocals that need taming.
- The Modern Classic: The Royer R-121. It brought ribbon mics back from the dead with a durable design that can handle modern SPLs.
- The Vintage Vibe: The Coles 4038. A British staple for drum overheads, known for its figure-8 pattern and smooth top end.
Pros:
✅ Natural, smooth high-frequency response.
✅ Figure-8 polar pattern for creative stereo techniques.
✅ Excellent transient response without harshness.
Cons:
❌ Historically very fragile (though modern ones are tougher).
❌ Lower output level (requires a good preamp).
❌ Expensive.
👉 Shop Royer on: Amazon | Guitar Center | Royer Official
4. Boundary and PZM Microphones for Room Ambience
Pressure Zone Microphones (PZM) are designed to sit flat on a surface (like a table or floor). They eliminate phase cancellation by placing the diaphragm right against the boundary.
- Best For: Conference rooms, capturing room ambience, and overhead drum mics.
- The Classic: The Shure PCC-160.
🎛️ Mixing Consoles: The Heart of the Signal Flow
The mixing console is where the magic happens. It’s the command center where you balance levels, shape tones, and route signals.
1. Analog Mixing Desks for Tactile Control and Harmonic Saturation
There is a reason people still buy used SSL and Neve consoles for $50,0. Analog consoles add harmonic saturation and “glue” to a mix that digital plugins struggle to replicate perfectly.
- The Workflow: Turning a physical knob feels different than clicking a mouse. It’s tactile and immediate.
- The Sound: Analog suming adds depth and width.
- The Downside: They are huge, heavy, and require regular maintenance.
2. Digital Audio Workstations (DAW) Controllers and Hybrid Consoles
Modern studios often use a DAW controller like the Avid S6 or SSL UF8 to control software like Pro Tools or Logic Pro. These provide the tactile feel of analog desk with the flexibility of digital recall.
- Hybrid Approach: Many engineers run their tracks through analog console for suming and EQ, then back into the DAW.
- The Benefit: You get the best of both worlds: the analog warmth and the digital precision.
3. Live Sound Digital Mixers for On-the-Fly Processing
For live sound, digital mixers like the Midas M32 or Behringer X32 are the standard. They allow you to save scenes, apply complex processing, and control the show from an iPad.
- Key Feature: Recallable settings. If a show goes wrong, you can reload the exact settings from last night.
- Built-in Processing: These mixers often have built-in compressors, gates, and EQs that rival standalone outboard gear.
🔊 Monitoring Systems: Hearing the Truth
You can’t fix what you can’t hear. Studio monitors are designed to be “flat,” meaning they don’t color the sound. They reveal the flaws in your mix so you can fix them.
1. Studio Reference Monitors for Flat Frequency Response
Unlike home speakers that boost bass and treble to sound “exciting,” reference monitors aim for accuracy.
- The Benchmark: The Yamaha NS-10. They sound terrible to most people, but if a mix sounds good on an NS-10, it will sound good everywhere.
- The Modern Standard: The Adam Audio T7V or Genelec 8030. They offer incredible detail and a flat response.
Comparison Table: Popular Studio Monitors
| Brand/Model | Type | Best For | Key Feature |
|---|---|---|---|
| Yamaha NS-10 | Passive | Critical Mixing | Reveals mid-range flaws |
| Adam Audio T7V | Active | Home Studios | Fast transient response (Ribbon tweter) |
| Genelec 8030 | Active | Professional Studios | Incredible durability and accuracy |
| KRK Rokit 8 | Active | Beginners | Affordable with good bass response |
2. Near-Field vs. Mid-Field vs. Far-Field Speaker Configurations
- Near-Field: Placed close to the listener (3-5 feet). Ideal for small rooms to minimize room reflections.
- Mid-Field: Placed further back. Used in larger control rooms for a more “immersive” listening experience.
- Far-Field: Massive speakers used in mastering suites to hear the “big picture.”
3. Headphones for Critical Mixing and Mixing
Sometimes you need to isolate the sound. Closed-back headphones are for tracking (recording), while open-back headphones are for mixing.
- Tracking: Beyerdynamic DT 70 Pro. Isolation is key here.
- Mixing: Sennheiser HD 60 or Audio-Technica ATH-M50x. Open-back designs provide a more natural soundstage.
👉 Shop Headphones on: Amazon | Sweetwater | Audio Brands Headphones Category
🎚️ Outboard Gear and Signal Processing
While plugins are great, outboard gear (hardware processors) adds a unique character and tactile control.
1. Compressors and Limiters for Dynamic Control
Compressors tame the dynamic range of a signal. They make loud parts quieter and quiet parts louder.
- The VCA Compressor: SSL G-Master Buss Compressor. The “glue” of modern mixes.
- The Optical Compressor: Universal Audio 176. Fast, aggressive, and perfect for vocals and bass.
- The Vari-Mu: Manley Variable Mu. Smooth, musical, and perfect for mastering.
2. Equalizers (EQ) for Tonal Shaping and Correction
EQs shape the frequency balance.
- Parametric EQ: Allows precise control over frequency, Q, and gain.
- Pultec Style: The Pultec EQP-1A is legendary for its “magic” bass boost and high-frequency shelf.
3. Reverbs, Delays, and Modulation Effects Units
Hardware reverbs like the Lexicon 480L or Eventide H30 offer textures that plugins struggle to emulate.
4. Preamps and Channel Strips for Color and Gain Staging
A good preamp is the first step in the signal chain.
- Clean: Grace Design m101.
- Colored: Neve 1073. Adds warmth and harmonics.
- Channel Strip: Universal Audio Apollo Twin. Combines preamp, A/D conversion, and DSP in one unit.
👉 Shop Preamps on: Amazon | B&H Photo | Universal Audio Official
🎹 Musical Instrument Digital Interface (MIDI) and Controllers
MIDI is the language of electronic music. It doesn’t carry sound; it carries instructions (note on, note off, velocity, pitch bend).
- MIDI Controllers: Keyboards like the Native Instruments Komplete Kontrol or Arturia KeyLab allow you to play virtual instruments in your DAW.
- MIDI Interfaces: Devices like the iConnectivity mioXM allow you to connect multiple MIDI devices to your computer.
Pro Tip: Don’t confuse MIDI cables with audio cables. MIDI uses the 5-pin DIN connector, while audio uses XLR or TRS.
🎧 Professional Headphones: Closed-Back vs. Open-Back for Tracking and Mixing
Choosing the right headphones is crucial.
- Closed-Back: Sealed ear cups. Prevents sound from leaking into the microphone during recording. Great for tracking.
Example: Beyerdynamic DT 70 Pro. - Open-Back: Ear cups have vents. Sound leaks out, but the soundstage is wider and more natural. Great for mixing and critical listening.
Example: Sennheiser HD 650.
Warning: Never use open-back headphones for recording vocals! The singer will hear the backing track in the room, and the mic will pick it up.
🔌 Cables, Connectors, and Signal Integrity
As mentioned in our quick tips, cables matter.
- Balanced Cables (XLR, TRS): Use three conductors (Hot, Cold, Ground) to cancel out noise. Essential for microphones and line-level signals over long distances.
- Unbalanced Cables (TS, RCA): Use two conductors. Prone to hum and interference. Keep them short (under 6 feet).
- Digital Cables (USB, Thunderbolt, AES/EBU): Carry digital data. Ensure you use high-quality, shielded cables to prevent dropouts.
Cable Matters: For a deep dive into cable types, check out the comprehensive guide from Cable Matters.
🏗️ Acoustic Treatment and Room Calibration Essentials
You can have the best gear in the world, but if your room sounds like a bathroom, your mix will sound like garbage.
- Bass Traps: Absorb low frequencies in the corners of the room.
- Diffusers: Scatter sound waves to create a more natural acoustic environment.
- Absorption Panels: Reduce reflections on walls and ceilings.
- Room Calibration: Tools like Sonarworks SoundID Reference or Dirac Live can measure your room and apply a correction curve to your monitors.
Pro Tip: Don’t just buy foam. Foam only treats high frequencies. You need dense fiberglass or rockwol for bass trapping.
🛒 How to Choose the Right Professional Audio Equipment for Your Studio or Live Setup
Choosing gear is about matching your needs to your budget.
- Define Your Goal: Are you recording a band? Mixing podcasts? Doing live sound?
- Set a Budget: Allocate funds wisely. Don’t spend 80% on a mic and 20% on the rest.
- Prioritize the Signal Chain:
Microphone (Source)
Preamp (Gain)
Interface (Conversion)
Monitors (Hearing) - Consider the Room: If your room is untreated, invest in treatment before buying a $3,0 mic.
💡 Common Mistakes to Avoid When Buying Pro Audio Gear
- Buying Expensive Gear for a Bad Room: As mentioned, room acoustics trump gear.
- Ignoring Phantom Power: Buying a condenser mic without a phantom power source.
- Using Unbalanced Cables for Long Runs: Resulting in 60Hz hum.
- Overloading the Preamp: Clipping at the source ruins everything.
- Chasing “Magic” Gear: No single piece of gear will fix a bad performance.
🏆 Top Brand Recommendations and Why We Trust Them
At Audio Brands™, we’ve tested hundreds of products. Here are the brands that consistently deliver:
- Shure: Unbeatable reliability for live and studio.
- Neumann: The gold standard for studio microphones.
- Universal Audio: Leading the way in hybrid analog/digital processing.
- Genelec: The most accurate monitors on the market.
- SSL: The heartbeat of the recording industry.
- Royer: Revitalized the ribbon microphone market.
👉 Shop Audio Brands on: Amazon | Sweetwater | Audio Brands Guides
❓ Frequently Asked Questions About Professional Audio Equipment
What are the essential types of professional audio equipment for a home studio?
To build a functional home studio, you need the core signal chain:
- Microphone: A versatile condenser like the Audio-Technica AT2020 or a dynamic like the Shure SM7B.
- Audio Interface: A device to convert analog to digital, such as the Focusrite Scarlett 2i2 or Universal Audio Apollo Twin.
- Monitoring: Studio monitors (e.g., Yamaha HS5) or high-quality headphones.
- DAW Software: The software to record and mix (e.g., Pro Tools, Logic Pro, Ableton Live).
- Acoustic Treatment: Basic bass traps and absorption panels.
How do I choose the right professional audio interface for my needs?
Look at input/output count, preamp quality, and latency.
- Solo Artists: 2 inputs/outputs (e.g., Focusrite Scarlett Solo).
- Bands: 8+ inputs (e.g., RME Babyface Pro FS or Antelope Audio Orion).
- Latency: Ensure the interface has low-latency drivers (ASIO for Windows, Core Audio for Mac).
What is the difference between active and passive professional speakers?
- Active Speakers: Have built-in amplifiers. They are plug-and-play, often include DSP, and are easier to match with the drivers. Most modern studio monitors are active.
- Passive Speakers: Require an external amplifier. Common in live sound and high-end audiophile setups. They offer more flexibility in amp choice but require careful matching.
Which microphones are best for recording vocals in a professional setting?
It depends on the voice and the room.
- Large Diaphragm Condenser: Neumann U87 or AKG C414 for detailed, bright vocals.
- Dynamic: Shure SM7B or Electro-Voice RE20 for smooth, warm vocals that reject room noise.
- Ribbon: Royer R-121 for vintage, smooth vocals that tame harsh sibilance.
How do I prevent hum and noise in my audio setup?
- Use balanced cables (XLR/TRS) for all connections.
- Ensure all gear is on the same power circuit to avoid ground loops.
- Use a power conditioner to clean up electrical noise.
- Keep unbalanced cables (like instrument cables) as short as possible.
🏁 Conclusion: Building Your Ultimate Audio Chain

So, we started with a question: Can you build a professional sound without breaking the bank? The answer is a resounding yes, provided you understand the signal chain and prioritize your room acoustics.
We’ve explored the rugged reliability of Shure dynamics, the delicate detail of Neumann condensers, and the raw power of Crown amplifiers (even if they are a bit loud for the living room!). We’ve seen how analog warmth and digital precision can coexist in a hybrid setup.
Remember, the “best” gear is the gear that helps you make the music you hear in your head. Don’t get lost in the specs. Listen, experiment, and trust your ears. Whether you’re setting up a bedroom studio or a live venue, the journey from the microphone to the speaker is a fascinating one.
Ready to start building? Check out our Audio Brand Guides for more specific recommendations, or dive into our Audio Accessories section for the cables and stands you’ll need.
🔗 Recommended Links and Resources
- 👉 Shop Microphones: Amazon | Sweetwater
- 👉 Shop Studio Monitors: B&H Photo | Guitar Center
- 👉 Shop Audio Interfaces: Amazon | Thomann
- Book Recommendation: Mixing Secrets for the Small Studio by Mike Senior. Available on Amazon
- Book Recommendation: Modern Recording Techniques by David Miles Huber. Available on Amazon
📚 Reference Links and Technical Documentation
- Shure: Shure Microphone Technology
- Neumann: Neumann Technical Documentation
- Audio Engineering Society (AES): AES Standards and Papers
- Inter BEE 2026: Professional Audio | Inter BEE 2026 The Comprehensive Media …
- Cable Matters: Audio Cable Types & Specifications
- Universal Audio: Universal Audio DSP Technology